Stock Photos
Showing posts with label action photography. Show all posts

Tuesday, 10 August 2010

The Rules Of Photography: Knowing When To Break Them


by Andrew Goodall

Creative photography is a mix of many ingredients; art and
technology, skill and patience, cold mechanical knowhow and
individual flair.


Penguin Book: The Basic Book of Digital Photography: How to Shoot, Enhance, and Share Your Digital Pictures by Tom Grimm, Michele Grimm

For a beginner learning the basics, it would be nice if there was a
simple set of rules to follow to make the whole thing easier.
Surely someone could just tell you what aperture to use in a given
situation, or how to structure a composition to get the best
results every time?

Photography is a lot like learning to drive. With a car, you need
to know the road rules, and you need to know the basic skills of
steering, accelerating and braking. These can be learned easily
with a bit of practice. But even when you have mastered the
essentials, you still need to get to know your car, because each
car is a little different. Then you need experience with night
driving, wet-weather driving, off-road driving...

What you must understand is that following the rules will only take
you so far. In photography, you will find that rules help you in
the beginning, and some rules will stay with you throughout your
career. The trick is to understand when the rules don't apply, or
when you should choose to ignore them. This is the type of
knowledge that can't easily be taught. It comes with experience,
and is what gives you individuality as a photographer.

Below are just a few of the rules that, for an experienced
photographer, are just made to be broken.

Cengage Course Tech. Book and CD-Rom: Understanding Digital Photography by Joseph A. Ippolito

Photography Rule #1.

Outdoor Photos Should Be Taken In The Early
Morning Or Late Afternoon.

This is one of the first principles of
landscape photography, and can be applied to almost any outdoor
photography. The softness and warm colour of the sunlight at these
times adds beauty and character to almost any scene. It also
creates much lower contrast, allowing you to avoid harsh shadows
and over-exposure of the highlights in your photos.

When can you break this rule? I can think of two situations
immediately.

Black and white photography is defined by contrast rather than by
subtle colour, so you often want stronger shadows to create the
best image. For this reason, black and white photos are often best
taken closer to the middle of the day when the light is stronger.

Rainforest photography is also best in the middle of the day, but
this time you don't want bright sunlight; you want cloudy weather
to create an nice even light throughout the forest. Otherwise the
patches of light coming through the canopy will create 'hot spots'
all over your image.

Pearson Education Book: The Digital Photography Book Kit by Scott Kelby

Photography Rule #2.

The Rule Of Thirds.


The rule of thirds is an
excellent guide for a beginner learning about composition. In
simple terms, it divides your photo into three parts, vertically
and horizontally. The dividing lines are the best places to
position long objects in a photo (like trees and horizon lines).
The points where the lines intersect are the most effective places
to position smaller objects for most impact.

Photos that are taken according to the Rule Of Thirds appear
balanced. They satisfy our natural sense of visual order and simply
look 'right.' Unfortunately, the world is not so easily organised
as the rule, so it is impossible in nature to take every photo this
way. Moreover, sometimes you may decide to ignore the rule, giving
more impact to the photo by shaking up the normal balance of the
composition.

When can you break this rule? Here is one obvious example, but I am
sure you can think of many more.

Sunset photos feature colourful skies, and silhouettes in the
foreground. If you have a truly spectacular sky, it doesn't make
sense to fill a third of the picture with empty blackness. You may
choose to tilt the camera up to make a feature of the sky, and
reduce the area filled by the foreground.

Cengage Course Tech. Book: Photography For The 21st Century by Katie Miller

Photography Rule #3.

Your Lightmeter Is Always Right.

Most of the time you can
trust your lightmeter. If it indicates your photo is well exposed,
it probably will be...but not always.

When can you break this rule? When there is a big difference in the
level of light between the subject and the surroundings.

You may be photographing a person, an animal, a flower etc. in full
sunlight, but the background is shady. This is a very effective way
of making your subject stand out from the surroundings. In this
situation, the different levels of light are bound to trick the
lightmeter. In fact, if you take your photo on auto, your subject
will most likely be overexposed. The best approach is to switch
your camera to manual, and adjust your aperture or shutter speed
until the photo is underexposed by one or two stops. This will
darken your background and bring the subject into perfect exposure.

Pearson Education Book: Photography, 10th ed. by Barbara Loudon, John Upton, Jim Stone

Can you see a pattern developing here? Rules are there for a
reason, and your skills will improve in leaps and bounds if you
learn them and practice them. But having done that, you are ready
to take the next step. Start experimenting outside the rules and
see where it takes you. Knowing and following the rules will make
you a good photographer. Choosing how and when to break them will
make you even better.

Click here to visit Digital Photography School.


ABOUT THE AUTHOR

If you found these tips helpful, Andrew Goodall has released two
top-selling ebooks that have already helped thousands of new
photographers learn the art and skills of nature photography. See
Andrew's images and ebooks at http://www.naturesimage.com.au
While you are there, enjoy even more great photography tips by
subscribing to our online newsletter...it's free!


Cengage Course Tech. Book: The Handbook of Photography by James A. Folts, Ronald P. Lovell, Fred C. Zwahlen

Thursday, 24 December 2009

10 Reasons to Turn off Your Autofocus

A Guest Post by Alistair Scott.

When I started using a camera autofocus was something out of science fiction. I mean … it would never work in real life, would it? Apart from anything else, how could it know what you wanted to focus on?
turn-off-auto-focus-01.jpg

Now fiction has become fact, and pretty well every camera has AF as standard. It works, and works well. But it doesn’t always work perfectly. It can pick up the wrong thing or fail to find anything to focus on, causing the lens to ‘hunt’ back and forth. Sometimes it won’t even let you fire the shutter.

So, here are ten situations when it’s worth turning your autofocus off and going back to the ‘good old days’ of manual focusing:

1. When there’s not enough light

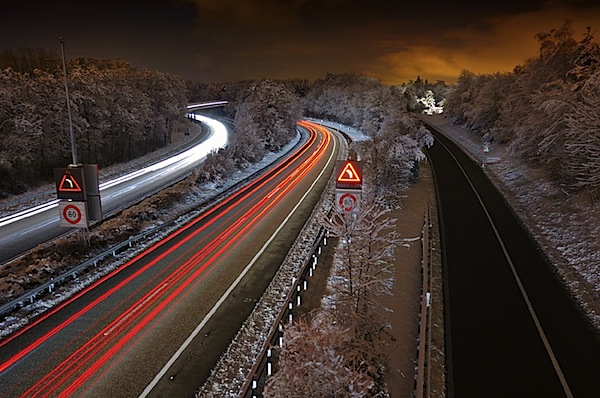
In low light, contrast is also low, and AF relies on light and contrast to latch on to things. Your camera may have an AF assist lamp built in. But, even if you have it switched on, it won’t work in situations like in the shot above.

Though the image looks bright enough, in reality there was little light, and it required a 30-second exposure.

2. When there’s not enough contrast

If your AF metering spot is on something like a plain-coloured wall the camera will find it impossible to focus, no matter how bright the light, and the lens will ‘hunt’. You can re-frame your shot temporarily so the spot is on something with detail and press the shutter half down to activate the AF. Then keep the shutter button half-pressed to lock the focus, and go back to your original composition. Or focus by hand.

3. Shooting wildlife

Most wild animals have excellent hearing and, no matter how good your autofocus, it will make a noise. Even the slightest whirr is likely to spook wildlife. Switch it off if you want those great, natural wildlife shots.

4. With landscapes

When shooting landscapes you usually want things in focus from the foreground to distant mountains. This means closing down the aperture to increase depth of field and focusing about a third of the way into the scene (at a point called the ‘hyperfocal distance’ where everything from quite close to infinity is sharp). Switch off the AF. If you leave it on, when you press the shutter it will re-focus … probably on those far-off mountains.

5. If you’re doing HDR

High Dynamic Range photography involves taking several shots of the same scene, all exactly the same except for exposure, then blending them when you’re back at the computer. It’s important to have identical focus in each shot to ensure success. With AF on, it may choose a slightly different focus point for each shot.

6. Fast action

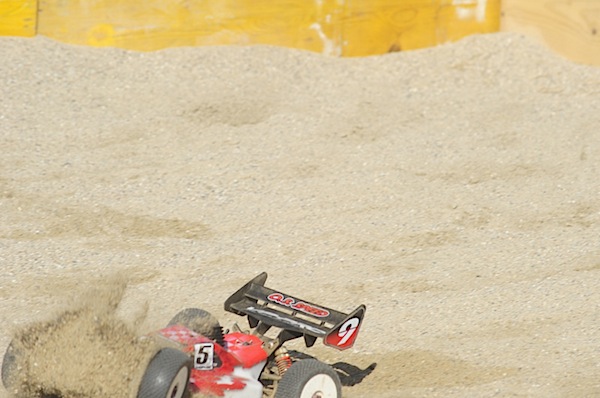
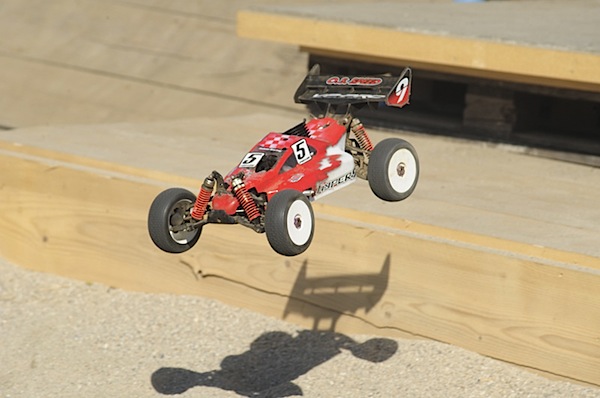
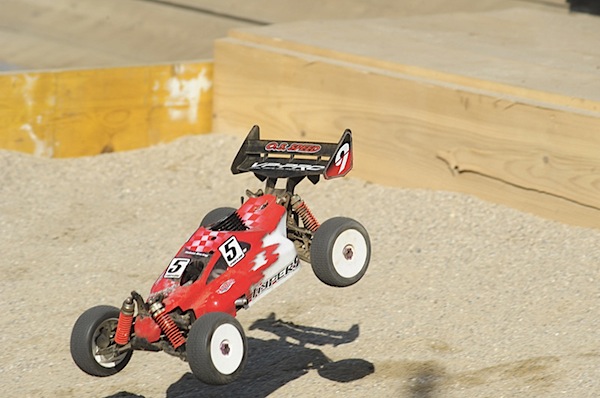
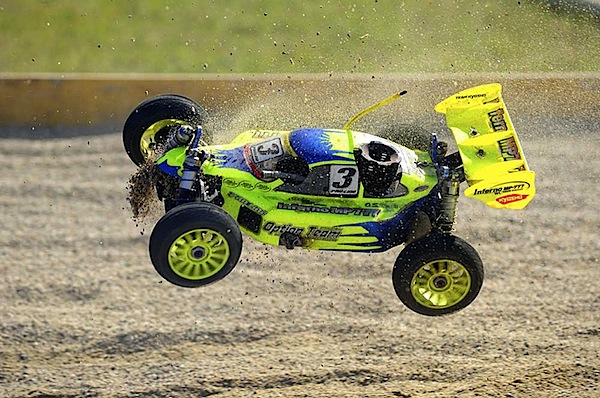
When you’re photographing a fast-moving subject, your AF will have its work cut out to keep up with the changing distances. Most times it fails. At this jump, in a radio-controlled buggy competition, I first started shooting in burst mode, with the AF switched on. This was the sort of thing I kept getting.
turn-off-auto-focus-02.jpg

turn-off-auto-focus-03.jpg

turn-off-auto-focus-04.jpg

It wasn’t until I switched the AF (and burst mode) off and pre-focused on a spot where most of the buggies landed that I started to get decent shots.
turn-off-auto-focus-05.jpg

7. Shooting through glass

Taking photographs through glass is generally not a good idea. Avoid it if you can. But sometimes it’s unavoidable, e.g. if you’re in a plane, or photographing fish in an aquarium. The trouble is, the AF may home in on reflections, or marks on the glass. So switch it off.

8. With portraits

The golden rule of portraiture is to focus on your subject’s eyes. What’s more, you often use a wide aperture to throw the background out of focus. But if your autofocus picks up your subject’s eyebrows or the tip of the nose then, because you’ve got such a narrow depth of field, the eyes will be blurred.

9. Macro

With macro photography autofocus has a hard time. The depth of field is so tiny that the camera has no idea what you want to focus on and the lens is likely to hunt wildly. You definitely must take control.

10. Composition with the ‘Rule of Thirds’

Many cameras have the autofocus spot fixed in the middle of the viewfinder. This means that if you’re composing with your subject at one of the classical ‘thirds’ positions it is likely to be out of focus.

turn-off-auto-focus-06.jpg

In this image a centralised autofocus would not pick up the boat and, on top of that, it would have difficulty latching to the smooth water of the lake.

So … autofocus is brilliant but it’s not infallible. A good photographer knows when to take control of the camera to get great shots in challenging situations

Alistair Scott is an award-winning freelance photographer and writer who has travelled the world widely. He lived for 20 years in Africa, but is now based in Switzerland. His latest book is ‘The LowDown Guide to Family Photography’, which can be seen at www.alscotts.com/fampage