Stock Photos

Wednesday 25 February 2009

How to store, retrieve and view your digital photographs.

The great thing about digital memory is it can be written to and read over and over again with out the loss of quality. Removable memory cards or "flash cards" have expanded the amount of information we can store and view and also allows you to take the card to a photolab for processing. The availability of high resolution printers that accept flash cards allows you to print your pictures off at home without the use of a computer.


If you're just starting out with a digital camera, or you are considering buying a new camera, and you like what you've heard about digital photography, you probably have a few burning questions about the technology. What replaces the film? Do you need a computer? What process replaces getting your pictures developed, and how can you store and view all your photos without having to print them off? This is a short guide that will answer these questions, and give you an idea about what your options are as far as storing, retrieving, and viewing your digital photographs goes.

When you take a picture with an optical film camera, you have a shutter opening for a fraction of a second, exposing photosensitive film to the light which is projected into an image by the lens, onto the surface of the film. The film stores a negative color impression of your image. Later it is “fixed” then developed into a “positive” true color photograph in a dark room (or these days, a compact machine which performs the same task.) When you're done, you get a copy of the fixed negative, and the true color photo.

The principle of digital photography isn't much different. A microprocessor-controlled photosensitive microchip-wafer is programmed to become receptive to light projected onto its surface by a lens for a fraction of a second. The chip then digitizes that image into a sequence of tiny colored dots, called pixels. This information is stored as a numerical sequence, which is then recorded to the camera's “memory”. This is the important part. A camera usually has a small amount of “on board” memory, sufficient to store somewhere between 15 and 100 photos. The amount of space that a given photo takes up on the memory depends on a number of factors, but quite simply, the more detailed a digital photograph is, the higher the number of dots used to produce an image is, and therefore, the sequence of numbers representing those dots is longer. So, a high resolution digital photo takes up more digital space in memory.

The great thing about digital memory is that it can be written to, and read from not hundreds, but hundreds of thousands, or even millions of times, without wearing out. Because cameras only have a relatively small amount of on board memory, removable memory cards, termed “flash cards” have been developed to store larger amounts of data. While your camera may store 15 or 20 high resolution photographs on it, flash cards can store between a couple of hundred, and several thousand such images, depending on the digital capacity of the card, and the photo quality. A flash card is a thin wafer, between roughly 1/32” and 1/8th of an inch thick, and usually not much larger than an inch square. There are several different formats of these cards in common use, and they make up the bulk of common image storage devices. These include: Secure Digital; CompactFlash (1 and 2); Memory Stick; MultiMediaCard; xD-Picture Card; and SmartMedia. All of these are usually abbreviated to their initial capitals. Of these, SD and CF are the most common.

You may have heard that all computers speak in 1's and 0's before, and this is true. The standard unit for measuring digital data is “bytes”. For the purposes of this exercise, 1 byte is always equivalent 8 “bits” which are either a 1 or a 0. So a sequence of eight 1's and 0's is 1 byte. This is a very, very small amount of data. On a computer, a byte is only enough information to store a single character, such as the period at the end of the sentence. To make things easier, we work in kilobytes kB (1024 bytes), megabytes MB (1024 kB), and gigabytes GB (1024 MB, or 10243 – that's 1,073,741,824 bytes!).

To give you an idea of scale, your medium or low resolution photographs on your camera are probably somewhere around 500kB, and your highest resolution photos are probably around 2.5MB. Commonly available flash cards range in size from 64MB, 128MB, 256 MB, 512 MB, 1 GB, 2 GB, 4 GB, 5 GB, 6 GB, and a few 8GB flash cards have recently been released. This means you could store more than 3000 very high resolution photographs on an 8 gigabyte flash card, no larger than an inch square! The smaller cards are much more cost effective, with a 512MB flash card being between $10 and $20 new. The 8GB ones are closer to the $250+ mark, and represent the pinnacle of miniaturized consumer-grade data storage. And for one final trivial point of reference, computers these days come with hard disk drives ranging in capacities between 80GB, and 500 GB, which makes your computer an attractive option for storing your photos.

If all that didn't make a lot of sense to you on the first read, don't worry. It's a subject that gets more complex the deeper go in, and people devote their lives to its study. The beauty is that you don't need to fully understand it to use it effectively. For a handful of dollars, you can store many hundreds of images. You can reuse your flash cards almost indefinitely. They will eventually get a scratch or crack from the friction of being removed and used, and they are very sensitive to static electricity, so eventually, they will fail. For this reason, it might be a good idea for you, or a friend with a computer, to back up your photos onto a more resilient medium such as a data CD or DVD.

This brings us to the next point: Do you need a computer?

The short answer is no, but it helps.

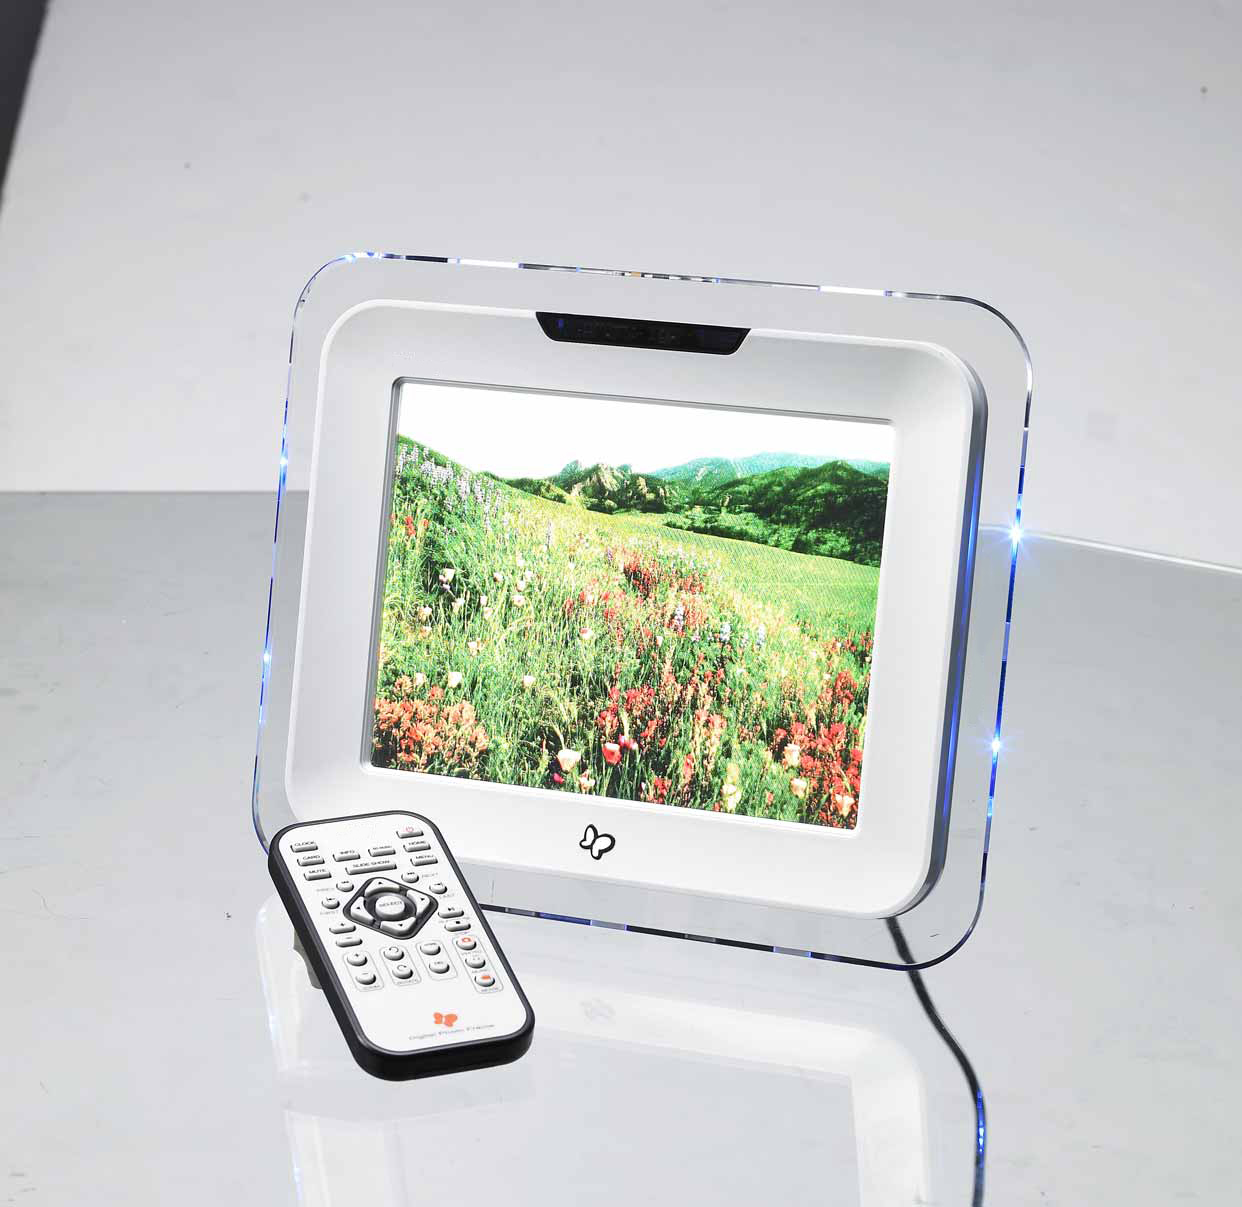
Fortunately, the market has developed whole product ranges for people who wish to remove the computer from the equation altogether, recognizing the demand that existed for such options. These days you can buy high-resolution printers for the home capable of producing photos almost as good as what you can have developed at the pharmacy, that plug straight into your camera, or have an on-board card reader. If you have a particularly nice photograph you want professionally printed, most photo developers have facilities to do just that. All you need to do is bring in the flash card or camera that the image is on. What a computer does offer you is a convenient way to edit and sort your collections. You can still view your photos on the camera itself, and most cameras are capable of plugging into your television, thereby allowing you to go through your photos like a slide show.

Never before have we had the ability to store so much information so easily. There is a huge range of options for storing your photos, and if you most like the idea of a sort of digital reusable film, capable of storing hundreds or thousands of photos, then you can pick up a small handful 512MB flash cards, and have a photo album so big you could never fill it. But if you do, never mind: there are already 32GB memory cards on the market. This means that on a 10 megapixel camera you can store at least a massive 6400 photos on it!


Delkin Devices 32GB eFilm Secure Digital (SDHC) PRO Card


Delkin Devices 32GB eFilm Secure Digital (SDHC) PRO Card


Sunday 22 February 2009

Bird Photography - How to 'Catch' Them

Birds have been one of the greatest subject for photographers for centuries now because they have an inspiring beauty and mystify us with their gift of flight and diversity.

When it comes to photographing birds and their behavior, catching it on 'film' will add a tremendous visual impact and feeling to any picture. There are different locations where birds gather, but really the best place you may what to start is your backyard. The thing about birds is that they are busy little bodies and a bird feeder in the backyard is a great place to get a picture when they are feeding or even the bird in the air getting ready to pounce one of the birds that is currently feeding.

When you venture out of your backyard to look for birds to photograph your vehicle may just become your newest piece of equipment. Birds see our cars less of a threat then a person carrying a long lens underneath their arm. A vehicle makes for a great blind and along with this patience is a virtue. When you find a location such as a prime feeding ground, park a bit of a ways from it and stop your engine to cut down on noise that may scare them.

Standard,wide-angle and short zoom lenses can be used for photographing birds, but for serious bird photography, a quality 500 mm or 600 mm telephoto lens is ideal.

Please keep in mind to avoid any situation that can put stress on the birds and their surroundings. If you notice a bird that is starting to show any kind of stress, this means that there is a nest or chicks near by. Any further picture taking should be disengaged and you should leave the immediate area. As a photographer of birds or any wildlife, it is a good thing to remember not to put ourselves or the birds around us in any kind of danger.

Here are some good books on the subject:


Sterling Publishing Book: Bird Photography


The Art of Bird Photography II by Arthur Morris

Digital Nature Photography: The Art and the Science

The BetterPhoto Guide to Digital Nature Photography (BetterPhoto Series)

And some equipment:

NatureScapes Skimmer Ground Pod II, for Ground Level Bird & Wildlife Photography


The Skimmer is the ultimate support for ground-level bird and wildlife photography. Made with super heavy duty reinforced crush-proof injection molded plastic it isrugged yet lightweight, weighing less than 15oz. With a unique circular design, it allows you to slide camera equipment in any direction on the ground, even through mud, sand, and grass. And your equipment stays clean and dry, even in upto an inch and a half of water! Approximately 10" in diameter and 1.5" high, the Skimmer's flat bottom allows itto slide and pan easily along the beach or mud without scooping up earth, protecting equipment from grit and moisture. The sides are turned out slightly to push sand and mud out and away, helping to keep debris from coming over the top. A protected area inside the plate can even be used to store teleconverters, extension tubes, and other incidentals for quick access while shooting. The Skimmer was designed by photographers for photographers to meet their rigorous demands in the field.


Canon Telephoto EF 500mm f/4.0L IS (Image Stabilizer) USM Autofocus Lens


Canon Telephoto EF 600mm f/4.0L IS Image Stabilizer USM Autofocus Lens


Canon Telephoto EF 600mm f/4.0L IS Image Stabilizer USM Autofocus Lens

Sunday 15 February 2009

What are digital picture frames and how do they work?

Digital picture frames are clever devices that can directly display pictures between the frame and the digital camera. Using a flat-panel LCD screen, pictures can be stored and displayed for a long period of time or multiple pictures can be viewed as a slide show.


A relatively new product in the digital imaging industry is what has become known as the digital picture frame. These clever devices use a flat-panel TFT (usually just referred to as LCD) screen to electronically store and display digital photos, which can be transferred directly between the picture frame and your digital camera. They can be powered by either batteries or an AC adapter power supply that plugs into your mains wall socket, and are capable of storing between thirty and more than a thousand digital photos, depending on the frame, the size of the files, and the capacity of the memory card being used.

While most people are probably aware of the numerous advantages of digital photography, there have always been a few areas where modern digital imagery simply didn't offer what people wanted out of their photos. With only a slightly wider profile than a normal picture frame, a digital picture frame retains all the benefits of digital photography, combining them with the convenience and most of the features people liked about conventional paper photos.

Digital picture frames solve most of the remaining problems people have about digital photography in a simple, easy to use, and cost effective manner. One of the main problems people have is that they don't have the time, opportunity, or knowledge required to view their pictures on the computer any time they feel like going through their albums. Digital picture frames solve this easily, as all prominent models on the market can store multiple images, and display them as a slide show. Most models allow the user to flip through each photograph one by one, much like they would with an old photo album. Older users, or the very young, who may not be familiar with computers, or may have no desire to learn, will enjoy the practical and straight-forward interface offered by these products. Learning how to use one could be compared to learning just the basic functions of a new television remote-control.

Digital picture frames allow the user to leave a photo on display for the long term, much like a conventional picture frame. This eliminates the cost of maintaining a printer and buying consumables, and allows you to have your picture of choice on display without tying up the computer.

When making a purchasing decision, you should compare the feature set offered by the different models available, with regard to your budget, and what you want from digital picture frames. Some things to consider include:

Media types: The number of different storage media that a single device can use - for example, SmartCard™, CompactFlash™ etc, and whether the device can accept multiple types. Remember to check which media type your existing digital camera uses.

Power options: How long the photo viewer's batteries last, what type of batteries it takes, and whether it has a power supply to run plug straight into the wall socket are all important to consider.

Physical dimensions: What size it is, how heavy, the look you're after, and how you intend to use it. If you want to carry a digital picture viewer around in your briefcase or pocket, you'll want a smaller, lighter model.

Data transfer interfaces: Some models allow you to transfer pictures between your computer and picture frame via serial or USB interface, in addition to the normal camera memory cards.

Various advanced features: The ability to connect the device directly to the Internet, and use it to send pictures to someone else who also has one is an example of just one deluxe feature.

Having laid down the criteria, it is possible to have a quick look at some of the products on the market today. The very cheapest digital picture frames start at about $40. These offer a very narrow feature set, with a tiny viewing area, rarely no larger than 3”, with relatively low quality image reproduction. For something of this size, you're probably better off simply viewing with your existing digital camera, or viewing its image on your television, a task most digital cameras are capable of doing to some capacity. Most of the frames on the market, however, fall between $200 and $450, so we'll have a very brief look at three such items.

VideoChip Wallet

While being a smaller model, the VideoChip Wallet has an appealing set of features, and is probably the choice for portability. If you prefer to carry your photos around with you wherever you go rather than setting a frame up on a side-table, then this is probably the one for you. The Wallet uses only CompactFlash card media, meaning that the number of photos you can store is limited only by the size of the JPEG or Bitmap files (.jpg, .bmp), and the storage capacity of your CF card. While the viewing area is just 4” with a 230x200 pixel display, it still manages to impress, weighing in at less than 11 ounces! It can be run directly off the included AC adapter, which also charges the internal 3 volt lithium batteries. This allows 3 hours continuous viewing between charges, and you don't have to worry about changing batteries, as you can simply just plug it in again to recharge, much as you would a cell-phone.

VideoChip Wallets offer rudimentary viewing options, either as a static image, a slide-show, as well as the option of several animated image transitions. They can be bought for about $350, making a Wallet a hefty purchase, considering that the main feature is its compact profile. But if you're always on the move, or delight in showing your friends and family your photos wherever you are, then maybe this is the one for you.


Ceiva Internet Connected Picture Frame

This really is a remarkable product. Ceiva boasts this as the world's first web-enabled digital picture frame. When you buy one of these, Ceiva signs you up with a subscription for their service for a period of time – usually a year – then you simply plug a spare phone line into the rear of the frame. At a scheduled time, say, at night when you're not making calls, the frame's integrated dial-up modem connects directly to Ceiva's servers and synchronizes with your account on their service, which you can configure from your home Internet connection, or by phone if you don't have a PC! In this way, you can download new pictures every day, or send them to family and friends also on the service.

The frame itself stores only 30 JPEG images, however, your Ceiva account can store thousands, in almost any digital picture format you care to name. Viewing options are wide and flexible, with a full complement of features. The frame is powered only by an AC adapter for constant use, meaning it is not especially portable. It features a large 8.2” LCD display, making it easily one of the biggest on the market. This is an excellent purchase, however, if all you want is a digital picture frame, and you are not so much concerned with the Internet capabilities, then you may find the small storage capacity and lack of other more rudimentary features too restrictive.

DigiFrame DF-560

If what you're after is a medium sized viewing area, with high-quality image reproduction and the most flexible range of features, then the DF-560 is for you. The DF-560 accepts both SmartCard media and CompactFlash cards, stores up 1,500 images on board, which display on a 5.6” high resolution 640x480 pixel LCD display. Also designed for constant, or all-day use, it is not battery powered, but runs off the included AC adapter.

It offers changeable cosmetic frames, which allow the user to have a wood finish, if they're after the authentic look, or something sleek and modern, giving an impression of brushed stainless steel, as well as everything in between. Again, you don't need a PC to run this, as it has everything it needs on board, and images can be transferred via either of the storage card slots.

However, if you do wish to use it in conjunction with a PC, it has a 9-pin serial port on the side, and includes a cable and software to allow you to transfer files directly between your PC and the frame, at a theoretical maximum transfer rate of 128kbps, or slightly better than twice the speed of a dial-up Internet connection. The DF-560 offers the widest range of slide-show transition effects, and allows you to prepare a number of customized slide shows using the images of your choice, all on the same card. As well as scaling large images down on the fly, which it is able to do with the inclusion of its relatively powerful processor, this digital picture frame packs a host of other features. All of this comes at a price, however, and while the feature set is great, the DF-560 retails somewhere around the $560 mark.

If you're in the market for something to put your digital photographs on display or to show to friends, then one of these could be for you. There are more than just the three digital picture frames reviewed here out there, and this brief examination is by no means exhaustive, but it should give you an idea of what the different features on offer are, and what to base your decision on. If you're after portability, then VideoChip's Wallet may be for you. If the idea and the possibilities of an invention such as an Internet digital picture frame really appeals to you, the Ceiva frame is a logical choice, and cost effective at that. If all-round solid performance and flexibility is what you're after, and you've got a budget to match, then give the DF-560 serious consideration.


Aw15B-Wf 15.4'' Digital Lcd Photo Frame With Wi-Fi Functions: R


Aw15B-Wf 15.4'' Digital Lcd Photo Frame With Wi-Fi Functions: R


PoGo! PPF100M4 Pholio Digital Photo Frame


PoGo! PPF100M4 Pholio Digital Photo Frame


Wednesday 11 February 2009

New Nikon Coolpix P90 Unleashed

Nikon recently unleashed eight new compact cameras on the world. The first one that I want to mention is the Coolpix P90, which packs a whopping 24X zoom lens (up from 18X on the Coolpix P80). Here are the details on this mega zoom camera:
Coolpix P90
* 12.1 Megapixel CCD
* F2.8-5.0, 24X optical zoom lens, equivalent to 26 - 624 mm
* Sensor-shift image stabilization
* 3-inch, tilt-able LCD display + electronic viewfinder
* Full manual controls
* New Smart Portrait feature combines fancy face detection (in which your subject doesn't have to be looking right at the camera), smile and blink detection, and red eye fix
* Can shoot at 15 frames/second (up to 45 shots) at 2 Megapixel resolution in Sport Continuous mode
* Records movies at 640 x 480 (30 fps) with sound
* 47MB on board memory + SD/SDHC card slot
* Uses EN-EL5 li-ion battery; 200 shots per charge


Photographers seeking high performance with a long zoom in a compact body now have the ideal camera with Nikon’s unveiling of the new P90. As part of the flagship Performance Series of COOLPIX cameras, the P90 offers new features that include a 24x Optical Zoom, a new 3.0-inch vari-angle LCD monitor with tilt function and anti-reflection coating; and 15 frame-per-second (fps) high-speed capability (up to 45 frames). The P90 is the ideal photographic tool for photo enthusiasts, travel photographers and consumers with more advanced photography skills.

“Our portfolio of cameras is designed to ensure that any photographer, at any level can find the camera that feels right for them,” said Bill Giordano, General Manager Marketing, COOLPIX for Nikon Inc. “The P90 blends the best of the digital compact and D-SLR camera worlds, allowing the more advanced consumer to really stretch their photographic capabilities.” The key to the versatility of the P90 is its 24x Optical Wide Angle Zoom-NIKKOR ED Glass Lens. This lens offers unbeatable compositional freedom, with its wide angle (26mm) to super telephoto coverage (624mm). The broad range lets consumers capture a variety of shots and scenes, ranging from sweeping landscapes to close-up action shots taking place on a sports field.

Additional features of the P90 include:

12.1 megapixels for stunning prints as large as 20 x 30 inches, while retaining fine detail.

3.0-inch Vari-Angle High Resolution LCD and Electronic Viewfinder make it easy to compose and share pictures with friends and family. The new LCD, with anti-reflection coating, can tilt as much as 90 degrees upward or 45 degrees downward. This enables photographers to shoot from higher angles or from the hip, and thereby make the best use of the reach and range of the 24x zoom lens. The incorporation of the high-resolution electronic viewfinder enables consumers to see through the lens in any lighting condition.

4-Way Vibration Reduction (VR) Image Stabilization

Optical VR image stabilization compensates for the effects of camera shake by moving the image sensor, producing clearer, sharper results in lower lighting or unsteady conditions.

Motion Detection automatically detects moving subjects and adjusts shutter speed and the ISO setting to compensate for camera shake and subject movement.

High ISO 6400 capability creates new opportunities to take sharper, more natural-looking photos in lower light conditions (ISO 3200 and 6400).

Nikon’s original Best Shot Selector (BSS) automatically takes up to 10 shots while the user presses the shutter, and saves the sharpest image.

Program, Shutter Priority, Aperture Priority and Manual Exposure modes give ultimate control over images. The D-SLR-type mode-dial on the top of the camera offers consumers greater personal and creative control, in any type of lighting condition.

New Sport Continuous Scene Mode for shooting at up to 15fps (up to 45 frames). This high-speed capture setting helps photographers stay ahead of the action.

Smart Portrait System, which integrates the following to make it a snap to capture stunning portrait photos of friends and family:

In-Camera Red-Eye FixTM, which automatically fixes most instances of red-eye.

Enhanced Face-Priority AF, which can detect up to 12 faces from a variety of angles, including straight on, from the side, or even in a multitude of three-quarter positions.

Smile Mode, which automatically detects when your subject smiles and releases the shutter.
Blink Proof, which automatically takes two shots and saves the one in which the subject’s eyes are open.

The P90 will be available nationwide in March 2009 and will retail at $399.95.

Source http://www.dcresource.com/news/newsitem.php?id=3869


Saturday 7 February 2009

Digital Noise - What Is It? What Causes It? And How Can I Get Rid Of It?

Digital noise appears as random pixels on the photo that do not seem to belong there. Although digital noise is not a problem for most photographers and is mostly evident in extreme scenarios, such as night photography, it is beneficial for every photographer to understand what digital noise is and how it can be avoided and removed should it appear on one of his or her photos.

Digital noise in photos taken with digital cameras is random pixels scattered all over the photo. It is a similar effect as “grain” in film photography and it degrades the photo quality.

Digital noise usually occurs when you take low light photos (such as night photos or indoor dark scenes) or you use very slow shutter speeds or very high sensitivity modes.

When taking pictures with a digital camera an electronic sensor (also known as a CCD) built from many tiny pixels is used to measure the light for each pixel. The result is a matrix of pixels that represent the photo.

As with any other electronic sensor the CCD is not perfect and includes some noise (also know as white noise to hint on its randomness attribute). In most lighting the light is significantly stronger than the noise. However in extreme scenes where the light is very low or when a high amplification is needed noise levels can become significant and result in pixels in the photos that include more noise data than real photo light data. Those pixels usually appear as random dots or stains on the photo (for example white dots scattered randomly on the photo).

Understanding digital noise in various scenes:

Low light (night photos or dark scenes):

When the scene is dark the amount of light measured by each pixel of the CCD is low. When the light intensity is very low it can become too close to the level of noise naturally found in the CCD. In such cases some pixels can appear as noise because the noise level measured for them is significantly close or higher than the actual light intensity.

Slow shutter speeds:

When the shutter is kept open for a long time more noise will be introduced to the photo. A slow shutter speed translates to the CCD integrating more light per pixel. The effect can be easily understood as the CCD “accumulating” light in each pixel and measuring the total light over the shutter period of time. However at the same time the CCD is also “accumulating” noise. For that reason in slow shutter speed photos some pixels will appear as noise because for these pixels the amount of noise integrated is significantly close to or higher than the actual light measured.

High sensitivity modes:

High sensitivity in digital photography is implemented by mechanisms that result in amplification. The CCD amplifies the measurements it takes. However there is no way to just amplify the actual photo light that falls on the CCD pixels. Instead the noise and the actual light are both amplified. The result is that the CCD becomes sensitive not only to light but also to its own noise. When too much amplification is applied some pixels will appear as noise.

While it is impossible to completely prevent digital noise there are a few options that allow you to significantly decrease it. When taking photos in low light scenarios such as night photos there are two main parameters to play with: sensitivity and shutter speed. Raising sensitivity creates more internal noise in the CCD while slowing down the shutter allows for more noise to integrate on the CCD. The amount of noise generated by both parameters is different. It is recommended that you set your camera to manual mode and play with a few different sensitivity/shutter speed pairs to find out the one that generates the least noise.

Some cameras include a built-in feature called “noise reduction”. Noise reduction is implemented by sophisticated software that can identify the noise pixels and remove them. For example the software can identify the noise pixels based on their randomness and usually extreme intensity gap between them and their neighboring pixels. Removing the noise can be implemented by interpolating a replacement pixel value based on its neighboring pixels.

If you do not have a built-in noise reduction feature or it does not work properly you can use a PC based software that removes digital noise. Many photo processing software include a combination of automatic and manual digital noise removal. Some software packages can also use a few photos of the same object to “average” them and thus remove the noise (relying on the fact that digital noise is random and the noise pixels will be different in each photo taken).

To conclude, digital noise should be understood by any amateur or professional photographer. However for most photographers digital noise is not a practical problem even in low light scenarios. Usually digital noise is minimal and can be significantly reduced by simply turning on your camera’s noise reduction feature. For professional photographers who shoot in more extreme conditions digital noise can present a real problem and can be dealt with using a combination of optimizing the camera settings and removing noise with professional software.

One of the best on the market is Adobe Photoshop CS4 Extended. This software delivers all the features in Photoshop CS4, plus new features for working with 3D imagery, motion-based content, and advanced image analysis. Click the image below to order your copy today.

Adobe Photoshop CS4 v.11.0 Extended - Complete Product - 1 User - Retail - PC

Friday 6 February 2009

Dreaming Winter Photography

Winter is one of the best times of the year to take photos, however, winter shooting can be tricky as majority of the landscape is white and the background is bright.


The sight of early morning snow, the shimmering frost in the trees, your sister falling off in your snow filled front yard and your stunning snow angel...

Don’t you ever wish you could just capture that moment right away and place them in your computer desktop? Right, sounds easy but for an amateur photographer this may sound too challenging and laborious. But thanks to the dawn of digital photography and winter photography need not be exclusive to the professional anymore.

You have to remember a few pointers though. Winter shooting can be tricky as majority of the landscape is white and the background is bright. When shooting a snow filled area, the brightness of the snow may often cause your digital camera to somewhat underexpose the scene, thus making the snow to look gray. To correct this, you might have to increase your exposure compensation so the whiteness of the snow can be appropriately captured. The time of the day you took the picture can also have an effect in your image. So if you want cooler shots shoot closer to midday but if you want warmer shoots, shoot early in the morning or late in the afternoon.

Although traditional photography belief tells us that using flash outdoor is not necessary but if you are shooting a winter photograph, using a flash can bring out details and highlights that might not be captured without it. However, if you are shooting close shots avoid using flash as much as possible as the reflection can greatly reduce any detail in your photo.


With the flexibility of processing available with digital cameras, you have better choices when in comes to choosing the finished format of your photograph. There is really nothing to lose to trying winter photography. You might even be surprised with the images that you captured. Once you have become accustomed to winter photography and have been familiar with the different techniques, you will find that winter is one of the best times of the year to go out there, take photos and make use of your digital camera. You will be surprised to see that the final results are worth the hassle.

Now that even the UK is having alot of snow you should grab the opportunity before it quickly melts away!

Just be careful you don't slip and fall!

Krister

Thursday 5 February 2009

Do You Want To Start A Photography Business?

If you enjoy taking pictures what could be more thrilling than doing it for a living?

Just think of how wonderful it could be to be a paid invite to hundreds of weddings and parties a year, to capture joyful family memories that will last a lifetime everyday, to watch children grow up, or even to just to experience others smile everyday of your career. With photography you can do just that. And what is great about the photography industry is there’s more than enough work for the freelance/work-at-home photographer.

To get started you need to get the right equipment. This will require you to decide exactly how far you want to take your business. If have a room in your home that you could set up as an office you might want to look into setting up a backdrop and lighting equipment. On the other hand perhaps you don’t have the space in your house. Don’t let this discourage you. You can still compete in the photography realm even without an office. One of the greatest thing about having a work-at-home photography business is that you can offer most of the same services that the photography shops offer, but at a fraction of the cost. Mainly, because you will not have to worry about a lot of overhead such as employees and rent, you will only have to worry about delivering quality photos.

Fortunately, delivering quality photos now days could not be easier thanks to the invention of the digital camera. If you have a low budget you can easily get started with a personal computer, digital camera, and above average printer. Of course if your budget isn’t quite so limited it would be a great idea to invest in some extra equipment like camera filters and zoom lenses.

After you have decided what equipment is essential to starting your business you need to start selling yourself. The great thing about photography is if you belong to a local club, church, etc there are always people in need of your services. Also, don’t forget your family since they can be powerful with putting the word out there. More than likely you will get most of your business through referrals. In this case customer satisfaction is essential. Word will spread like wildfire if your services stink. So remember whether your taking photos for free at your nephews wedding, or your getting paid to take photos at your local school prom always put your best foot forward. In fact one of the easiest ways to start building your portfolio is to start taking free pictures of friends and family.

Last, if your business really gets rolling you might want to consider registering your business. Taking care of legalities gives your customers a sense of security. It lets them know that you mean business. Also, at this point you may want to start advertising in the phonebook, newspaper, or even listing your services on the internet. The internet can be a powerful resource because you can set up an online portfolio to display all of your handiwork.

You can do it! To start a work-at-home photography it is going to take dedication. Make a plan and stick to it! Remember, this is something you love! Treat your job like you love it and your job will love you!

A great source of help and tips is http://photo.net/, a community of photographers. Here you can ask other succesful photography-business men for advice.

I wish you all the best with your plans!

Krister

Tuesday 3 February 2009

A Guide To Buying A Digital Camera

How to Buy Digital Camera Equipment

There are so many digital cameras that it can be confusing trying to buy a digital camera. Here are some tips to help you decide which the best choice is for you and buy a digital camera that you will get the best results with:

• The first step before you buy a digital camera is to set a basic budget on how much money you want to spend. You do need to be realistic about the fact you won't be able to get the best of every feature, as you may have to make tradeoffs when you actually buy a digital camera.

• Your experience level has to have a big influence in your decision to buy a digital camera. There is no point in buying too much buy a digital camera than you can actually use. For a novice you should buy a digital camera that is point and shoot so that you don’t have to worry about manually changing any settings. Digital zoom is not as important a part in the process of choosing to buy a digital camera as you may first think. Basically it just means that the camera crops the picture and gives you the center piece of it. You do not need to buy a digital camera that does this as you can do it better yourself after you take the picture. You can usually move closer to the subject anyway and to buy a digital camera that includes an optical zoom can add a lot of unnecessary cost and weight to the camera. Of course, expert photographers will want to buy a digital camera that gives them more manual control over the exposure process.

• Next you need to consider what you will use your camera to capture before you set out to buy a digital camera. A fast shutter speed is necessary for moving subjects. You can also buy a digital camera that has special features to enable you to take multiple pictures in quick succession for high-action pictures.

• There are a number of helpful websites that give reviews on photographic products to help you decide on the best camera for your needs before you buy your digital camera. Of course, you can also ask friends and family about their digital camera choices. Price comparison websites are also essential to help you to buy digital cameras at the best possible prices. Remember that when you buy digital camera equipment there are often a list of extras that you may want to purchase, including batteries and memory cards.

Don't be tempted to go for a trendy-looking, colorful camera if you really want to buy a less cool looking one that does more of what you want. Make sure that you have got as many of the features that you wanted to have in the first place and haven't compromised too much on them for the sake of a few extra dollars. It is important to ensure that you buy digital camera equipment that you are happy with and enables you to take the photographs that you want.

A good place to look for digital camera equipment is B & H, one of the worlds largest retailers of digital camera equipment.

Monday 2 February 2009

8 Tips For Better Digital Photos

Whether you consider yourself an amateur photographer, or you just want to create better family photos, there are many things you can do to get better photos. Here are some easy tips to use the next time you head out with your digital camera.


Whether you consider yourself an amateur photographer, or you just want to create better family photos, there are many things you can do to get better photos. Here are some easy tips to use the next time you head out with your digital camera.

Even a beginner can take professional-looking photos - suitable for framing.

Be Prepared

Keep all your photography equipment ready for use. Collect everything you’ll need into one place. A camera bag is ideal, because it keeps all your stuff together and lets you carry it all with you. Everything in its place. A good camera bag will let you organize a miniature tripod, extra batteries, memory cards, etc. - even a plastic bag or waterproof housing to protect your camera in wet weather.

Hold your Camera Steady

Blurry photos are almost always the result of camera movement. Just your own unsteadiness, causes your camera to shake enough to blur your pictures.

So steady yourself and your camera before you take the shot.

Plant your feet firmly on the ground and tuck your elbows in close to your sides. Instead of using the LCD viewer, steady your camera against your forehead and frame the shot using your camera’s viewfinder. You can also steady your upper body by leaning against a wall or a tree. Or totally eliminate any camera movement by using a tripod.

Once you’re all set, gently press the shutter release in one motion. Pressing the shutter release too hard could jerk the camera downward.

Get Closer

One difference in “snapshots” and really great photos is the composition of the shot. Unless you’re shooting an outdoor landscape, you can improve most photos just by getting closer to your subject. Depending on the situation, you can physically move closer to your subject, or use the zoom feature on your camera for the same effect. Try to get within a few feet of your subject so you eliminate most of the background. You’ll like the results.

Take more Pictures

Even professionals take loads of shots of the same subject - to get just a few that they will use. With a digital camera, you can delete the images you don’t like, and only print the winners - so don’t hesitate to take several shots of the same subject. Change the angle of the shot. Get a little closer. Adjust the lighting.

Why not fill the entire memory card with pictures of your kid at the pool, or your daughter in her cap and gown? The more pictures you take, the better the odds that you’ll get a few shots that will really thrill you.

Vary the Lighting

Using natural light will give better skin tones when photographing people, so try not to use the flash if you don’t have to. Outdoor daylight shots are easy, but you’ll have to be a little more creative when shooting indoors. Try using the light coming in from a window for warmer tones than you would get using the flash.

Experiment with natural lighting. You can get stronger shadows by moving your subject closer to a window, and turning your subject can create more dramatic shadows.

Eliminate Red-Eye

Red-eye is the result of light passing through your subject’s eye and reflecting back. You’ll get it more often when using your flash, just because the light from the flash isn’t as diffused as natural light. So the first tip for eliminating red-eye is simply to avoid using your flash when you don’t absolutely have to.

Another way to reduce red-eye is to have your subject look anywhere but at the camera. This reduces red-eye because any reflection isn’t directed back at your camera lens.

If you have to use the flash, some digital cameras have a built-in feature to automatically remove red-eye. Use it.

Go for Candid

Instead of posing two (or more) people looking directly at the camera, get a shot of them interacting with one another. Even two people having a conversation is more interesting than having them stand next to each other facing the camera. Some of the best professional portraits have the subject captured deep in thought, with their attention focused inward, rather than on the camera lens.

It makes a more interesting shot. Your portrait will look more natural - less posed.

Create a Scene

Putting your subject in the center of a photo is just boring. You’ll get a much more pleasing result if you place your subject off center when you frame the shot.

This is a truly professional technique. Place your subject so that they occupy 1/3 to 1/2 of the total composition, but NOT at the exact center of the frame. Capture an interesting background object in the rest of the frame.

Anybody can practice these techniques. They’re easy and you’ll get better, more professional photos.

Please let me know how you get on!

Krister

Sunday 1 February 2009

5 Tips For Shooting Winter Landscapes

Some of us, regardless how harsh the weather gets, will brave the tough elements in search of the crisp winter light. Planning well in advance will help make your trip more enjoyable.


Winter brings out the toughest elements in our climate, with many people putting away their camera bags ‘till early spring. But, if you do put away your camera you are missing out on the raw beauty that this magical season brings.

Here are a few tips to make the trip more enjoyable.

1. Wear the right clothes: It’s very important to wrap up warm when out shooting winter images. The winter season brings the toughest elements, so if you are planning to spend a few days out and about always be well prepared.

2. Watch the weather: It’s very important to know what the weather is going to be like. You don’t want to travel for a couple of hours and then hear a weather report that tells you that: the weather is wet for the next few days. During the winter months the weather can dramatically change in a matter of hours.

It’s always advisable to let someone know where you are going and which route you’re planning to take. If you do get injured or ever caught in a storm someone may be able to help.


3. Carry only what you need: Carry only the essentials. You don’t need to upload your camera bag with every piece of equipment you own. If you are going to be out taking pictures all day you are much better off going as light as possible. Carrying a light load will also help preserve energy. You could be climbing icy rocks or crossing snow filled hills; a warm flask would serve you a lot better than a third camera.


4. Look for detail: Snow, ice and frost bring out texture and atmosphere in most subjects. The early frosty morning is an ideal time for close-up photography. The frosty morning also brings out patterns in our landscapes.

Take care where you place your camera: if you are taking pictures early in the morning try placing it at oblique angles to the sun - this will give your images strong shadows. This will also add mood to your landscape images. Once you have found the perfect spot pay extra attention to foreground interest as this will add depth to your image.

5. Expose carefully: Snow and ice are extremely difficult to expose properly. Snow usually confuses your cameras metering system or your hand held light meter. When you take a light reading from snow you will automatically get an underexposed image. The meter will record the snow as grey.

Now is the time to start bracketing your shots. If you bracket your shots add 1 - 2 stops of light to compensate for your light meter reading. Using an 18% grey card, which wil be in more detail in a future article, should also give you a perfect light reading.

Don't get cold!

Krister